5' X 8' TANDEM AXLE TRAILER: TAILGATE FITTING
HANGING THE TAILGATES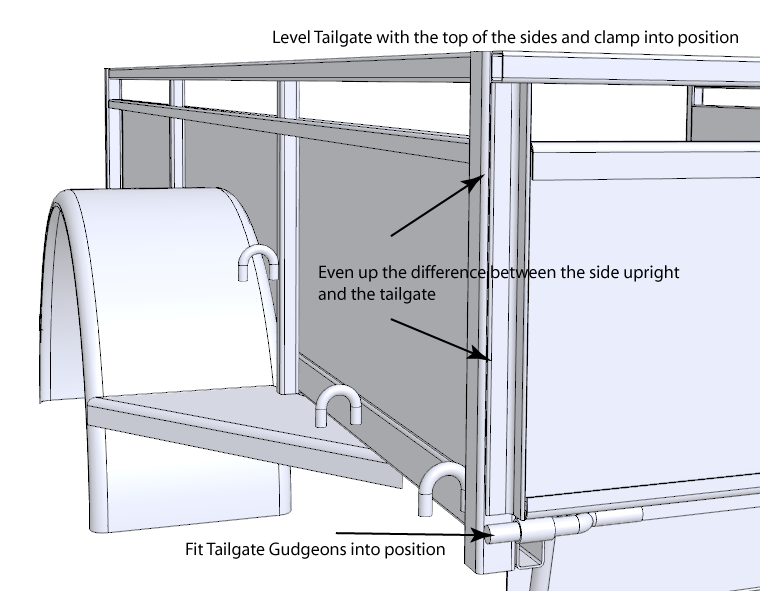
Position the tailgate onto the trailer so that the top of the tailgate is flush with the top of the trailer sides. Clamp into position and slowly adjust the tailgate so that the difference in width between the tailgate and the uprights is even.
Slide the gudgeons into the hinge pipes until there is a little resistance. Do not force the gudgeon into the pipe as this may cause the tailgate to jam when operating.
Level the gudgeon to the tailgate and tack weld onto the light channel/front cross member.
Once all gudgeons have been tack welded, unclamp the tailgate and check its operation.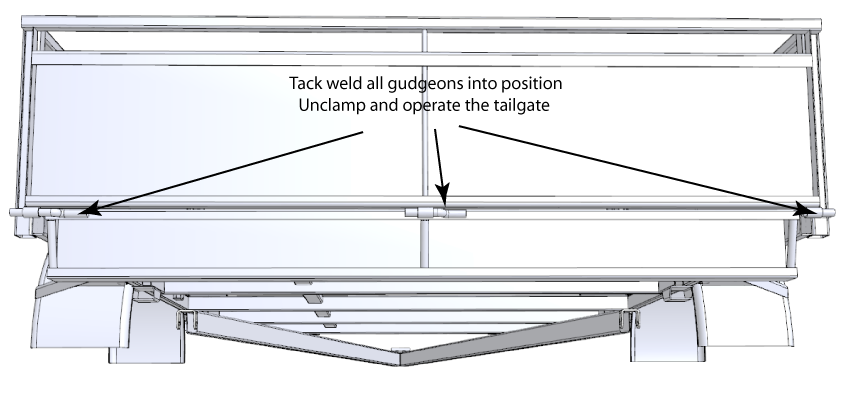
The tailgate should operate smoothly up and down and if it jams up, find the culprit hinge/gudgeon and adjust as needed.
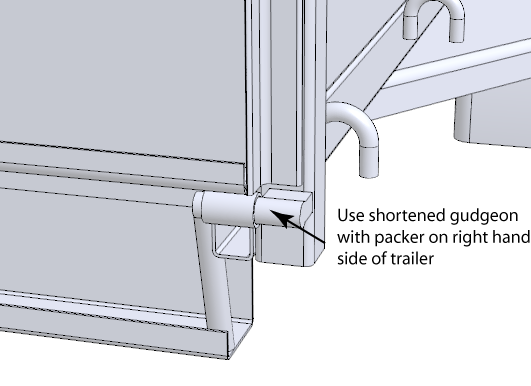
Once the tailgate is functioning correctly, remove the tailgate and fully weld the gudgeons in place. It does pay to mark each tailgate with a spot of weld so there is no confusion when fitting the tailgates at a later date, especially if the trailer is to be galvanised.
Repeat the process with the other tailgate.
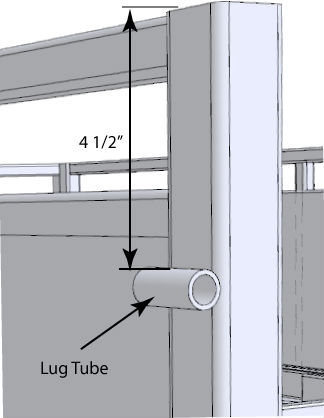
We have go back to the end uprights on the sides to fit the Lug tube. Measure down 4 1/2" from the top of the upright and mark on all four corners.
Place the lug tube against the side of the upright with the top of the tube level with the line. Tack weld the tube position and check it for square and fully weld.
Carry on around the trailer until all four corners are complete.
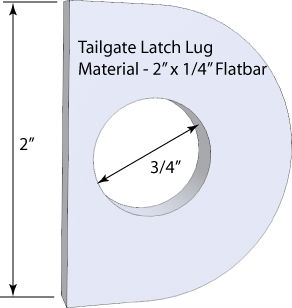
Raise and clamp the tailgate in the up position and place the latch plate centrally covering the lug pipe. Use a marker through the lug pipe and mark the center for drilling.
Remove latch plate and drill oversize to suit your drop lock - 3/4" is a standard size.
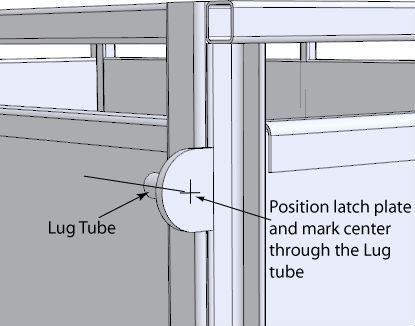
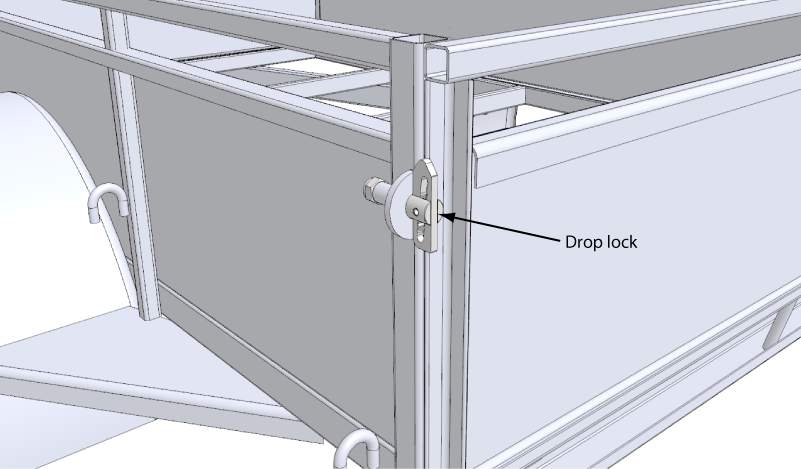
Fit the drop lock to the lug pipe, place the drilled latch plate over the drop lock and latch in position. Centralise the latch plate then tack weld to the tailgate. Remove the tailgate once both latch plates are tacked in place and fully weld.
