4'6" X 7' SINGLE AXLE TRAILER: SPRINGS
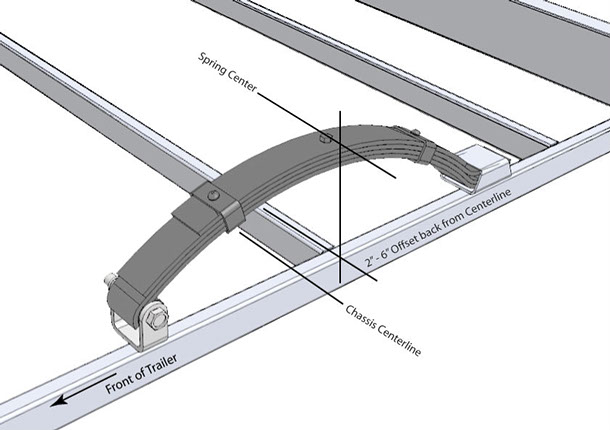
Divide the chassis in half and mark the chassis rails, then accurately measure where you want the spring centers to be - ideally between 2" to 6" behind the center of the chassis and a good compromise for general cartage is midway at 3" behind the center. Double check your measurements.


Set up your springs in their front hangers and position the springs and hangers on the chassis rails (hanger towards the front of the trailer) and using a large square resting on the chassis rail at the spring center mark, adjust the spring position until the spring bolt or pin is in line with the spring center marked on your chassis.
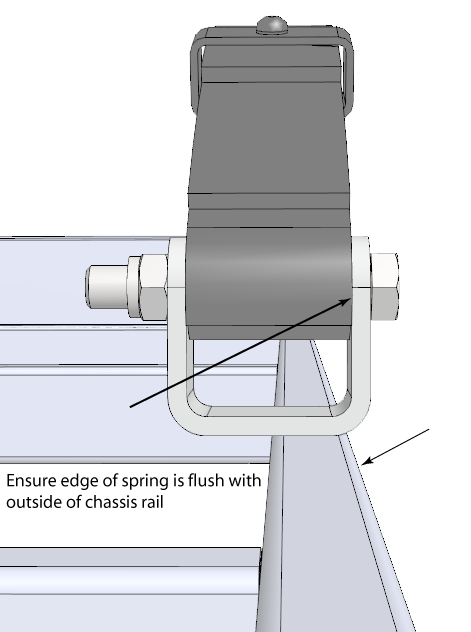
Make sure that the outside spring edge is flush with the outside edge of the chassis rail and once double checked, tack weld the spring hanger to the chassis rail.
Once this is completed on both sides, position the slippers over the spring tails allowing for clearance between the spring and the slipper for the spring to move in and out when loaded.
Again make sure the outside edge of the spring is flush with the outside edge of the chassis and tack weld the slipper in place.
Spring Packers
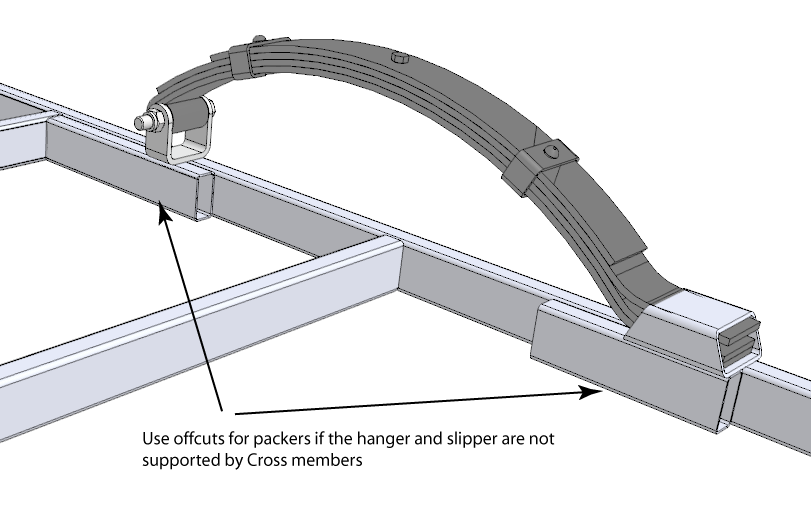
If the position of your hangers and slippers do not cover a cross member you will need to cut a couple of packers to support the overhang of these parts and weld into position.

Once all components are in position, remove the springs and fully weld around the hanger, slipper and packers