4'6" X 7' SINGLE AXLE TRAILER: DECK
The following information is for fitting plywood decking. If you want to use a different material, click on Trailer Decking for more information.
Plywood decking is a versatile and hard wearing decking material. It is relatively cheap and easy to replace if it gets damaged. Plywood normally has two graded faces, with one face being better than the other.
For trailer purposes a "AC" or "BC" grade of plywood is more than suitable. Ensure that the plywood is either a marine or exterior grade to prevent de-lamination of the ply. It does pay to handpick your plywood from the merchant if possible, as there may be a few imperfections that pass the "B" grade but would look un-sightly on your trailer.
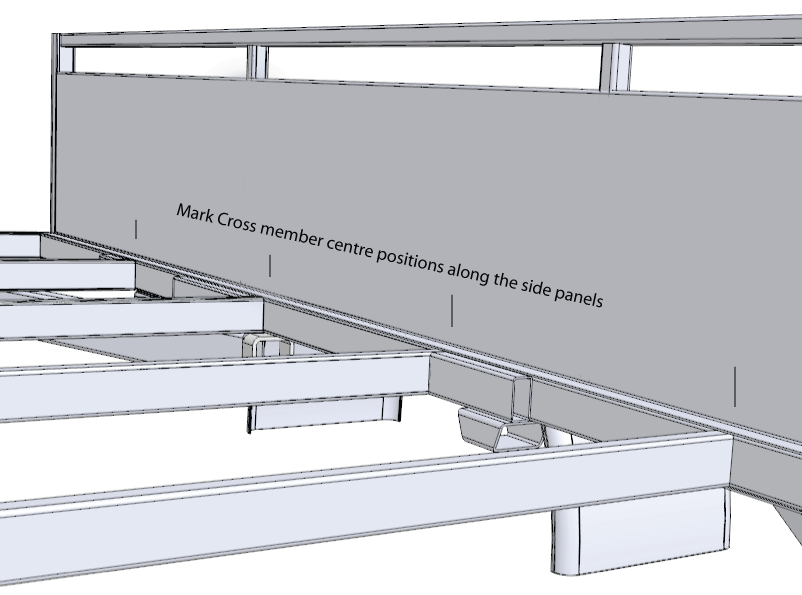
Before positioning your plywood on the trailer, mark the positions of your cross member centers along the side of the trailer above the level of where the plywood will sit.

Lay your the main sheet of plywood against the side furthest from the deck joiner (if fitted), adjust the sheet so that it is level with the front crossmember and rear light channel. Clamp sheet into position.
Measure the gap in the deck for the remaining sheet (double check measurements at both ends and in the center of the trailer) and cut the second sheet to fit.
Lay this in position with the mill edge (the uncut edge) against the first sheet of plywood and clamp into position.
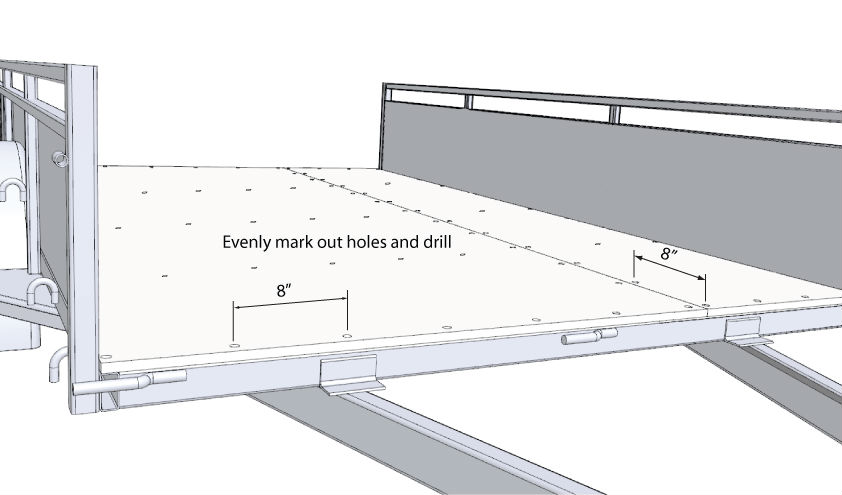
With a string line or a straight edge, mark the sheet across the width from the marks on the side panels.

Mark out evenly across the lines spacing the hole centers at approximately 8" apart both along the cross member marks and down the outer edges and the join.
Fastenings
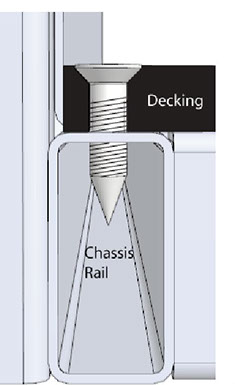
 There are a couple of options for fastening your deck to your chassis. Rivets have been used for many years, but after a couple of years of carting loads around, rivets tend to fail and pop out. By far the best option is self tapping countersunk screws and if you have a good powerful electric hand drill, this job will not take long. For a 3/4" deck thickness, 8G x 1 1/4" screws are ideal. A 1/8" hole needs to be pre drilled and then the screws can be driven in by either hand or with the electric drill and screw attachment.
It pays to start at one end of the trailer and work your way down to the other end to prevent any buckling of the deck.
As with all timber, the plywood deck will swell and shrink depending on how wet or dry the environment is, and you may find over time, the occasional screw breaking from this action on the deck. If this does happen, increase the size of the replacement screw to a 10G x 1 1/4".
Once the deck is screwed down, give the deck a good going over with an orbital sander to take off any high spots. For a really good look, roller some exterior oil based stain over the deck.
We're almost finished, click on FINISHING