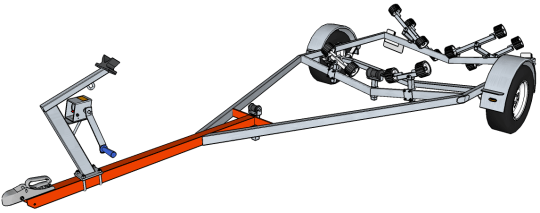
4.7m (15ft) Boat Trailer
Drawbar

Once the chassis main frame is square, it is time to cut, drill and fit the drawbar section.

Find the centre of the drawbar brace and weld the drawbar central with the top face of the drawbar, flush with the top edge of the brace.
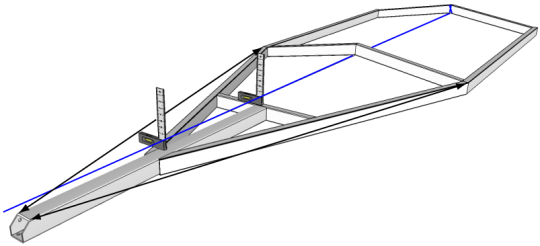
Tie a string line to the centre of the rear crossmember and run it under the centre of the front crossmember up to the end of the drawbar.
Using a square, align the centre of the drawbar with the string line. Check the drawbar alignment along its length. Double check the alignment by measuring from the front of the drawbar to a point on the chassis at identical points on both sides of the trailer.
When all measurements are identical, tack weld securely.
Check again for chassis and drawbar squareness and alignment, clamp or sandbag to secure and fully weld all components.
Drawbar Drilling
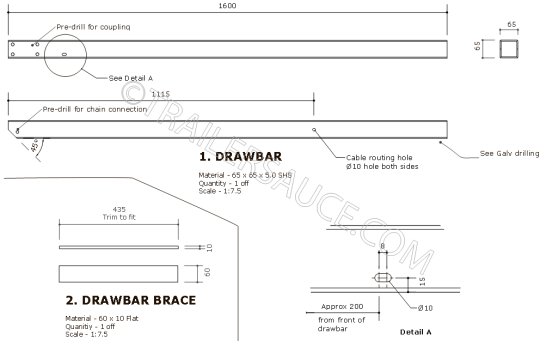
Drill holes as shown in the detail above - predrill the holes for mounting the coupling, around 200mm back from the front of the drawbar drill, cut and file a slotted hole to allow 2 sets of lighting cables to exit from the drawbar, and a hole on both sides of the drawbar 1115mm back from the front of the drawbar to allow the light cables to route from the chassis rails into the drawbar. A set of galvanising drain holes are also required on the underside of the drawbar near the drawbar brace - see "Galvanising Preparation" for more details.
Australian Trailer Builders -
Now is a good time to fit the safety chain to the trailer - the safety chain must be permanently attached to the trailer (welded) and the weld must extend around 50% of the circumference of the welded link and the adjoining link must have free movement.
Weld the safety chain as near as practicable to the coupling.
Click here for more details on Australian Safety Chain & Shackle Regulations