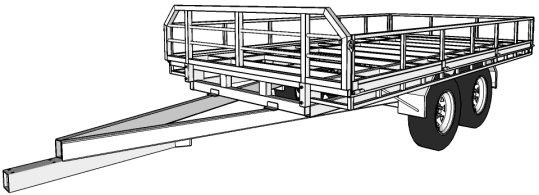
Fitting a headboard, sides and tailgate give the trailer added functionality as well as giving additional security to your load. Filling the trailer with loose material like aggregate, blocks, bricks or even firewood is nearly impossible to transport on a flatdeck without sides.
Being fully removable (you can even use the sides as lightweight ramps) gives the trailer versatility that your standard trailer could never have.
Even if you think you may never need a headboard or sides, consider fitting the headboard sockets and hinge pins now. It will certainly make life a whole lot easier if you change your mind in the future.
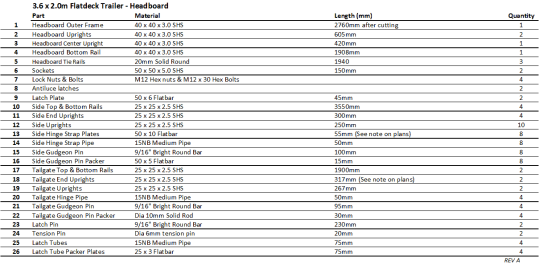
HEADBOARD CUTTING / PARTS LIST
FABRICATING THE HEADBOARD
Building the headboard is pretty straight forward. Cut and mitre 40 x 40 x 3.0 SHS for the main frame and uprights, drill the uprights for the horizontal rods, square all the components and weld together.
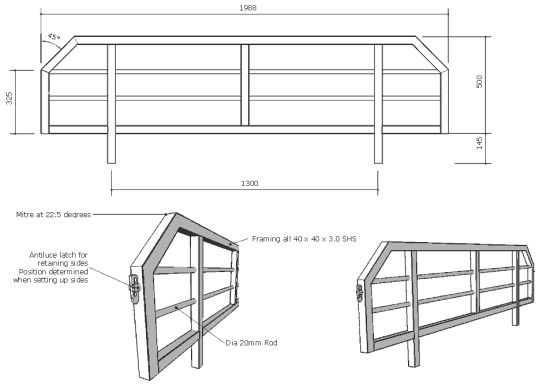
The 20mm rod can be replaced with pipe or smaller diameter rod if required. The antiluce positions are finalised when the sides have been manufactured and fitted.
SOCKETS
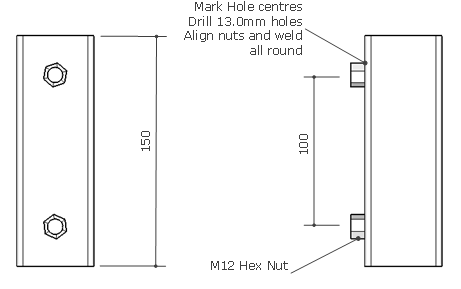
For the sockets, cut to length, 2 sections of 50 x 50 x 5.0 SHS, file out the seam weld running on the inside of the hollow section.
Drill 13mm holes for the M12 locking bolts to go through.
Once drilled, locate 12mm hex nuts over the holes, clamp and weld.
Line up the sockets so they are flush with the top of the front chassis cross member and vertically flush and in line with the sub chassis packers.
Clamp the sockets well and gently fit the headboard into position. Get a mate to help you slide the headboard up and down and re-align the sockets if there is any binding or tight spots.
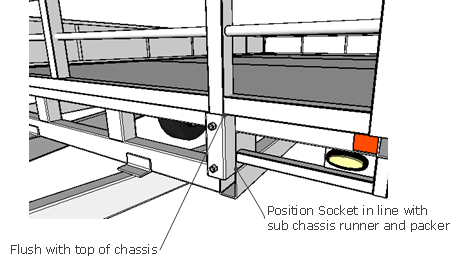
Fully weld the sockets to the trailer once happy with their position.