TRAILER BRAKES: DRUM BRAKE BASICS
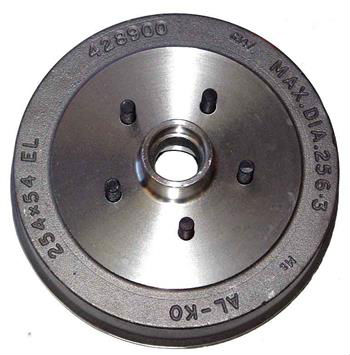
Drum brakes consist of a backing plate which is bolted onto a fixed plate on the stub axle. The backing plate contains the brake shoes, levers/springs and the actuating method for operating the brakes (mechanical lever, hydraulic cylinder, or electro magnet). The drum itself is a heavy casting which provides the friction surface for the brake shoes and contains the bearings and seals as well as the studs for mounting the wheel.
When braking occurs, the actuator pushes the brake shoes outwards to contact the spinning drum. The friction between the brake shoes and the drum slows or stops the trailer.
Drum brakes, due the way the shoes have contact with the circumference of the drum will normally provide more braking force than the same diameter disc brake. The disadvantage is that drum brakes produce and retain more heat during braking, and are more complicated to setup and maintain than disc brakes, They are often cheaper to purchase and are normally more powerful than their counterparts. Drum brakes also require less space than disc brakes and can assist in reducing the overall width of a trailer if it is bordering on its legal maximum.
Drum brakes have a natural tendency to self energize, where, during normal operation, the spinning of the drum can draw the brakes shoes closer to the surface of the drum. Under braking, the shoes bite harder into the drum and can provide increased braking power. This characteristic of self-energizing also makes the drum brakes more susceptible to “brake fade” which is a reduction in brake friction under heavy braking. Under normal conditions this would not be an issue, but if towing heavy loads down steep inclines or where sustained braking is needed, high temperatures within the drum will cause the brakes to “soften” and become less reliable.
Once cool, the brakes will return to their normal state, but it would pay to remove the drum and check the condition of the brake shoes. If any glazing has occurred, use a fine grit emery cloth to sand the shoes gently and replace the shoes if they showing signs of wear or damage.
Drum brakes also have another drawback which is quite the opposite to “brake fade” and that is when the brakes are cold and damp or if there is any rust forming on the drum. In these circumstances, the brake shoes can “grab” onto the drum and can cause the wheels to skid even when no brake pressure is applied.
The situation may resolve itself quickly depending on the weight of the trailer and the road surface, or, due to the self-energizing characteristic of the shoes, may intensify the problem to the point where you need to get down on your hands and knees to pull the unit apart and remedy the problem.
The key to using drum brakes is to ensure that they are setup exactly to the manufacturer’s recommendations and that you check and maintain them on a regular basis, especially if they are operating close to or at their rated limits.
Drum brakes come in a range of diameters and their braking power increases as their diameters get larger. Before selecting drum brakes, ensure that the brake drum unit will fit within the trailers wheel rim.
Drum Brake Basic Setup Procedure
1. Place the backing plate over the axle and tighten the bolts until they are finger tight.
2. Grease the bearings and fit them and the seal to the drum.
3. Slide the drum assembly over the axle until it sets correctly - watch your fingers don’t get jammed between the drum and backing plate!
4. Tighten up the castle nut until there is no play in the bearings and then back the castle nut off slightly.
5. Adjust the brake adjusters on the backing plate until the brake shoes lock onto the drum .
6. Tighten the backing plate bolts onto the axle. The backing plate should now be central on the axle.
7. Back off the brake adjuster until the drum turns freely without any noticeable drag
8. Re seat the bearings once again by tightening and backing off the castle nut while slowly turning the drum. Loosen the castle nut just enough so that the hole in the axle and castle nut groove are aligned and fit the split pin.
9. Fold over split pin so that is it fixed in position and fit the dust cap.
10. Check and re-adjust the bearings after the first 500 miles